Ford F-150 Window Tint Guide
The right tint on an F-150 changes how the whole truck looks and feels to drive — but getting the VLT percentage, film type and legal compliance right matters before you commit.
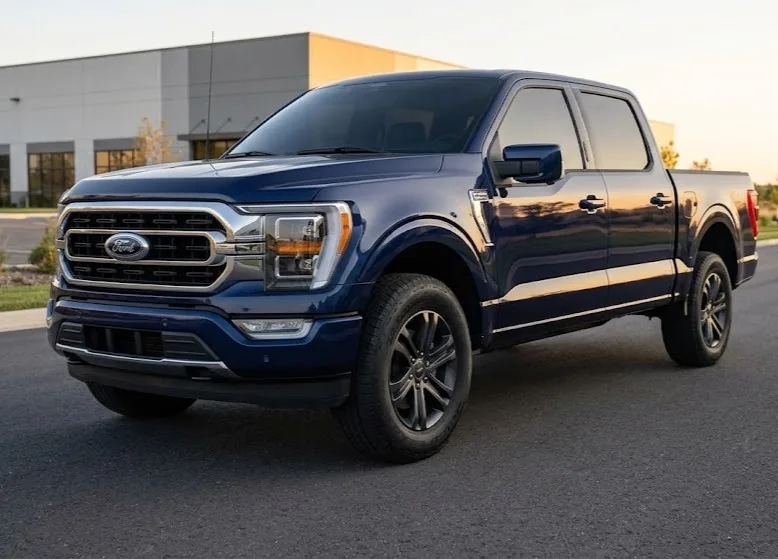
Why Window Tint Works Particularly Well on the F-150
The F-150's large glass area — particularly the crew cab with its full rear door windows — means tint has a bigger visual impact than on most passenger cars. Darkening the glass pulls the whole truck together, especially on lighter paint colours where the glass would otherwise read as a pale band across the side profile. Combined with blacked-out trim or a leveling kit, tint is one of the highest-impact appearance changes per dollar on the F-150.
Beyond aesthetics, tint reduces interior heat load significantly on a truck with a large cab. Front occupants benefit from UV blocking on side glass; rear passengers benefit even more since rear windows on a crew cab get direct sun exposure for most of the day in warm climates.
VLT Percentage — What the Numbers Mean
VLT stands for Visible Light Transmission — the percentage of visible light the film allows through. Lower VLT means darker tint. The most common confusion is between how dark tint looks from outside versus how much it affects visibility from inside — these are different things.
| VLT % | Appearance | Night visibility | Common use |
|---|---|---|---|
| 50% | Light — subtle darkening | No impact | Windshield strip, legal front side in many states |
| 35% | Medium — clearly tinted | Minimal impact | Front side windows in most states |
| 20% | Dark — privacy glass appearance | Some reduction | Rear side and rear window on most trucks |
| 15% | Very dark | Moderate reduction | Rear windows where legal |
| 5% | Limo black — near opaque | Significant reduction | Rear window only, check local law |
Check your state law before ordering. Window tint regulations vary by state and by window position — front side, rear side and rear glass often have different legal limits. Many states allow darker rear tint on trucks and SUVs than on passenger cars. Verify your state's current limits at the DMV website before choosing a VLT percentage.
Ceramic vs Carbon vs Dyed Film — Which to Choose
Film type matters as much as VLT percentage for long-term satisfaction. The three main categories available at DIY price points are dyed, carbon and ceramic.
Dyed film is the cheapest option. It blocks some heat and UV but fades over time — the colour shifts purple within a few years in direct sun. Not recommended for a truck that sits outside regularly.
Carbon film does not fade, blocks more heat than dyed film and does not interfere with signals or electronics. The matte finish reads more naturally on truck glass than the glossy appearance of some dyed films. A good all-round choice for DIY installation.
Ceramic film is the best performer — highest heat rejection, no signal interference, no fading, and the clearest optical quality. It costs more than carbon but for a daily-driven truck in a warm climate the interior temperature difference is real and noticeable. Professional installers predominantly use ceramic on premium installs.
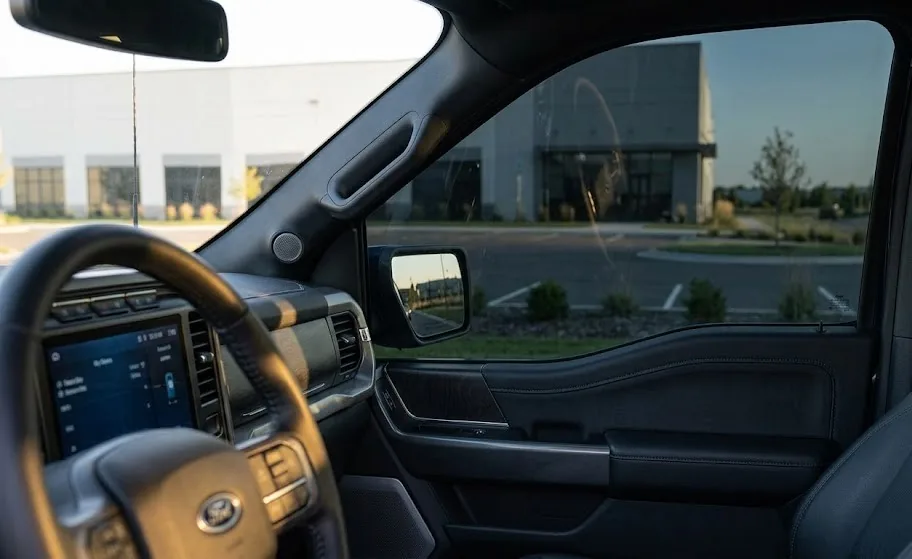
Pre-Cut Kit vs Roll Film — F-150 Specific
For DIY installation on an F-150, pre-cut kits are strongly recommended over roll film. The F-150's rear door windows — particularly on the crew cab — have curved edges and complex shapes that are difficult to cut accurately from a roll without professional tools and experience. Pre-cut kits are shaped to your exact cab configuration and year, eliminating the need to trim around the defroster lines on the rear glass and the complex curves of the rear quarter windows.
Roll film is cheaper and gives more flexibility if you are experienced with tint installation. For a first-time installer, the pre-cut approach produces a cleaner result with less waste and lower risk of bubbles from poor trimming.
Cab configuration matters for pre-cut kits. F-150 pre-cut kits are specific to Regular, Super Cab and Crew Cab body styles. They are also year-range specific — the 2015–2020 body has different glass shapes from the 2021+ generation. Always confirm your cab style and year before ordering.
Choosing Tint Film for an F-150
Compare visible light transmission (VLT), heat rejection, reflectivity, film warranty and whether the kit is cut for your exact cab and model year. A darker film is not automatically better at reducing heat; film construction and solar-energy rejection matter. Check the current tint rules where the truck is registered before choosing a shade, and consider professional installation if the rear glass is curved or the film kit does not include clear vehicle-specific instructions.
DIY Installation Tips for F-150
Clean the glass thoroughly before starting — any contamination under the film causes permanent bubbles. Use a dedicated glass cleaner and lint-free cloths, then wipe down with a diluted soap solution immediately before applying the film. Work indoors away from dust and direct sunlight — a garage with the doors closed is ideal.
The F-150's rear window defroster lines require care — never use a metal squeegee near defroster elements. A soft rubber squeegee or a felt-edged card is the right tool here. Work the film from the top edge downward, pushing air outward to the sides as you go.
Allow 3–5 days for the film to fully cure before rolling windows down. During curing you may see small water bubbles — these are normal and disappear as the adhesive sets. If bubbles remain after 7 days, they are trapped air rather than water and indicate a problem with the installation.
Choose Tint by Glass Position, Not Just Appearance
The front doors, rear doors, rear glass and windshield are not the same decision. Most owners choose a conservative legal shade for the front doors and a darker, privacy-oriented shade behind the B-pillar. The windshield is subject to the strictest rules in most places and is usually limited to a top strip. Check the rule for your state before selecting a VLT; factory glass already has a visible-light-transmission value, so the finished reading is darker than the film rating alone.
For a work truck, night visibility matters as much as daytime heat rejection. Very dark film can make reversing into an unlit driveway, seeing pedestrians or checking a trailer more difficult. A high-quality ceramic film at a legal or moderate VLT can reject more heat than a cheap, darker dyed film while keeping useful nighttime visibility. That is usually the better everyday F-150 choice.
Pre-Cut Kits Versus Professional Installation
Pre-cut kits save material and remove the need to trim around the F-150's large side glass, but they still require careful surface preparation, a slip solution, a squeegee and a clean working area. Dust, dog hair and loose weatherstrip debris become permanent visual defects once trapped under the film. A roll is more flexible for an experienced installer but creates more opportunity for cutting errors and wasted material.
Professional installation is worthwhile when you want ceramic film, one-piece rear glass coverage, a warranty, or a result that will be inspected closely. Ask whether the quoted film is dyed, carbon or ceramic, whether removal of door panels is required, and what the shop will do if a piece lifts at an edge after curing. Give the film time to cure before operating the windows; the exact period depends on weather and the installer's instructions.
Care After Tinting
Do not use ammonia-based glass cleaners on window film. Use a soft microfiber towel and a film-safe cleaner, and clean in straight passes rather than scrubbing an edge. Small water haze or tiny bubbles can be normal during the cure period, particularly in cooler weather. Large creases, contamination or an edge that continues to lift are installation problems and should be addressed under the install warranty rather than pressed repeatedly at home.
F-150 Tint Checklist Before You Book
- Check your state VLT rule and whether a medical exemption is relevant.
- Decide on front-door shade separately from rear privacy glass.
- Ask for the film brand, series, warranty and ceramic heat-rejection specification.
- Inspect the glass and weatherstrips before installation so existing scratches are documented.
- Plan to leave the windows closed for the curing period recommended by the installer.
Choose a shop or kit supplier that can state the finished VLT clearly. The paperwork is useful if local enforcement or an annual inspection questions the installation.
Frequently Asked Questions
What tint does the F-150 come with from the factory? Ford's factory privacy glass on rear windows of crew cab F-150s is approximately 20% VLT — it is not film, it is a tinted glass laminate. Adding film on top of factory privacy glass darkens it further and may push it below legal limits in some states.
Will tint affect my F-150's backup camera or sensors? Standard tint film does not affect backup cameras or parking sensors. Avoid applying film over the camera lens itself. Some metallic films can interfere with radio signals — ceramic and carbon films do not have this issue.
How long does window tint last on a truck? Quality ceramic or carbon film lasts 10+ years without fading or bubbling when properly installed. Cheap dyed film typically starts showing purple discolouration within 2–4 years in direct sun.
Can I tint the F-150 windshield? Most states allow a tint strip across the top of the windshield above the AS-1 line — typically the top 5–6 inches. Full windshield tint is illegal in nearly all US states. Check your state's specific law before applying any windshield film.
Professional vs DIY — what does professional installation cost? Professional installation on a crew cab F-150 typically runs $200–$400 depending on film type and region. Ceramic film installs often cost $350–$500 at a reputable shop. DIY with pre-cut kits brings this down to $50–$100 in film cost if you are comfortable with the process.