Honda Civic Chrome Delete Guide
A practical guide to chrome delete on the Honda Civic — vinyl choice, surface preparation, installation method, durability and how to remove it cleanly if you change your mind.
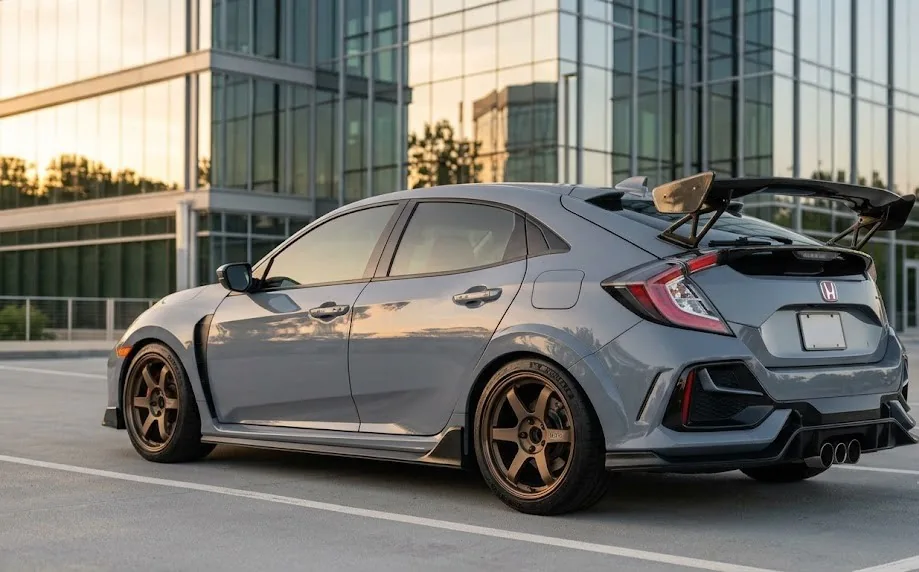
What chrome delete actually is
A chrome delete replaces bright chrome or silver trim pieces with a darker finish — usually gloss black, satin black or matte black vinyl — to create a cleaner, more unified exterior. On a stock Civic, the chrome accents around the grille, window surrounds, door handles and badging can look visually busy against certain paint colours. Deleting them pulls the car together without changing its silhouette or requiring any permanent modification.
It is one of the few exterior modifications that can be done gradually — start with one area, see how it looks with your paint and wheels, and expand from there.
Vinyl vs painted trim vs pre-cut overlays
| Method | Cost | Durability | Reversible | Best for |
|---|---|---|---|---|
| Quality cast vinyl | Low to medium | Good with correct prep | Yes | Most daily driver Civics |
| Painted trim | Medium to high | Excellent | No | Permanent builds only |
| Pre-cut overlays | Medium | Varies by supplier quality | Yes | Simple flat shapes |
| Plasti-Dip style coating | Low | Lower — chips easily | Yes (peels) | Temporary test only |
Vinyl selection — what matters
Not all vinyl is equal. The key difference for exterior automotive use is between calendered and cast vinyl. Cast vinyl is thinner, more conformable around curves and edges, and holds its colour and finish longer under UV exposure. Calendered vinyl is cheaper and fine for flat or low-curve surfaces but can shrink at edges over time in direct sun.
For a Civic chrome delete, cast vinyl from 3M (2080 series) or VViViD Ultra Gloss is the standard recommendation. Both stretch over curves, take heat well and can be repositioned during installation before the adhesive fully sets. Buy slightly more than you think you need — waste happens during fitting.
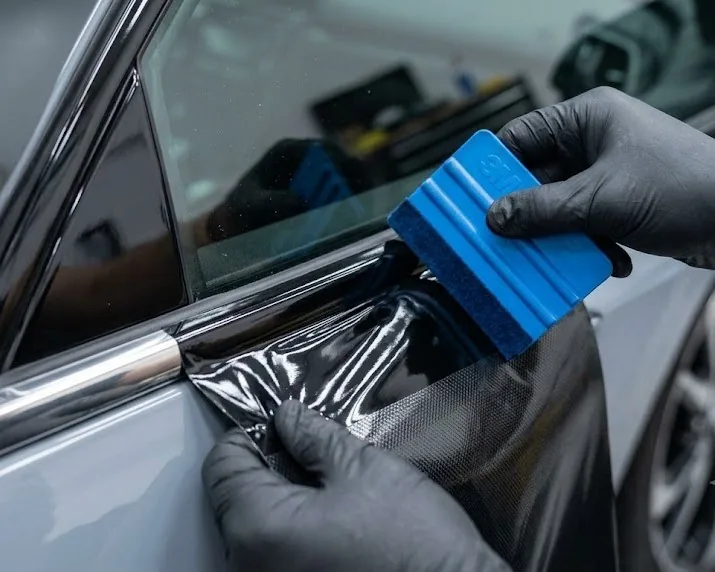
Preparation — the only thing that matters
The surface must be completely free of wax, polish, silicone, grease and moisture before the vinyl adhesive goes down. Wash the trim with car shampoo, then wipe with isopropyl alcohol (90%+) on a clean lint-free cloth. Do not use panel wipe products that leave a residue. Work in a covered space above 15°C — cold vinyl does not stretch and cold adhesive does not bond well.
Do a dry fit of every piece before removing the adhesive backing. Trim to rough size with scissors or a sharp craft knife, then position and smooth the piece in place without stretching it. When you are happy with the position, peel back a small section of the backing and begin laying the vinyl down from the centre outward.
Installation steps
Work one trim piece at a time. Lay the vinyl down from the centre out to prevent air bubbles from being trapped. Use a soft squeegee or a felt-edged card to push out air as you go. Use a heat gun on a low setting around curved sections to soften the vinyl and help it conform — do not overheat or the vinyl will stretch and thin. Tuck edges under trim lips where possible rather than cutting flush with the surface, which gives the cleanest result and prevents lifting.
Allow 24 hours before washing the car or exposing the freshly laid vinyl to water. Check every edge after the first wash and reseal any lifting edges immediately with a hair dryer and firm pressure.
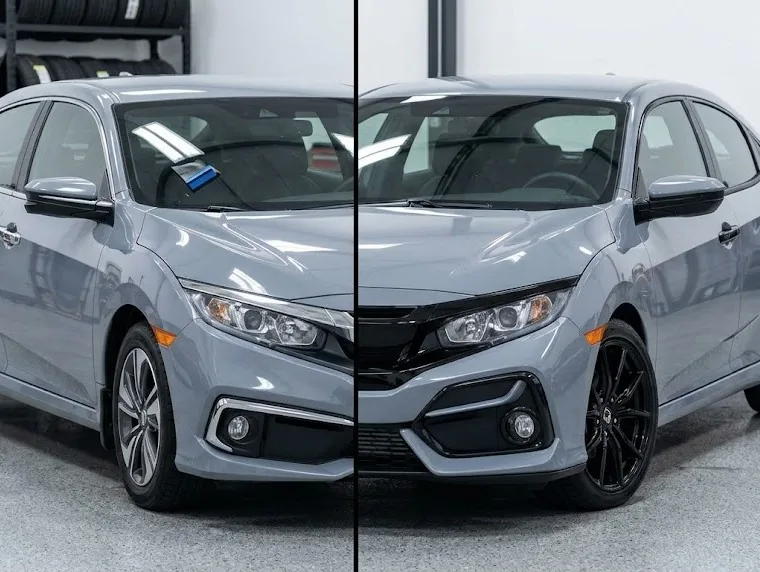
Removal
Chrome delete vinyl can be removed cleanly if the original trim is in good condition underneath. Use a heat gun or hair dryer to soften the adhesive, then peel the vinyl slowly at a low angle. Adhesive residue — if any — comes off with isopropyl alcohol or a dedicated adhesive remover. Work slowly on painted or fragile surfaces to avoid pulling paint or leaving marks.
What to Delete and What to Leave Alone
Common Civic chrome-delete targets include window trim, grille details, badges, emblems, door-handle accents and exhaust trim. Treat each surface differently: a removable badge is not the same job as textured grille plastic or a high-heat exhaust surround. Decide whether the goal is a full blackout look or a restrained OEM-plus contrast before buying material.
| Method | Best for | Trade-off |
|---|---|---|
| Vinyl wrap | Window trim and reversible changes | Preparation and edge work matter |
| Paint | Permanent, durable components | Harder to reverse |
| Replacement part | Badges or trim with poor wrap surfaces | Higher part cost |
Finish, Preparation and Removal
Gloss black reads closest to factory piano-black trim; satin black hides light scratches and can look more subdued. Clean, decontaminate and dry the panel before vinyl. Use heat sparingly around curves, avoid stretching the film too far, and tuck edges only where water will not constantly lift them. Quality vinyl can be removed with gentle heat, but old or baked-on material takes patience. Pair the change with the Civic hatchback mods guide, 10th-gen wheel guide or ducktail spoiler guide for a coherent appearance build.
Civic Chrome-Delete Areas, One by One
Window Trim
Window trim is the most visible chrome-delete area and usually the best candidate for quality vinyl because it is long, smooth and reversible. Clean the edge thoroughly, avoid trapping water under the film, and inspect corners after a few heat cycles.
Grille, Badges and Emblems
Grille pieces can be textured or tightly curved, so a pre-cut overlay or replacement part may be more durable than stretching vinyl around every recess. Badges and emblems are often better removed or replaced than wrapped. If removing an emblem, use suitable adhesive-removal methods and avoid levering against paint.
Door Handles and Exhaust Trim
Door handles receive constant hand contact, so small overlay edges can lift sooner than window-trim film. Exhaust trim is only suitable for a finish rated for the local heat exposure; do not apply ordinary vinyl near a hot exhaust outlet.
DIY Cost, Professional Cost and Durability
DIY cost depends on how much material is wasted during learning and whether tools are already on hand. A professional install costs more but can be worthwhile for long window trim, complex grille parts or owners who want a finish warranty. Durability depends on film quality, surface preparation, sun exposure, wash methods and whether edges were overstretched. A careful removal with gentle heat is usually less risky than aggressive scraping.
Common Chrome-Delete Mistakes
Most failures come from wrapping dirty trim, using too much heat, stretching the film across a compound curve, cutting against paint, or choosing gloss black when a satin factory-style finish better suits the car. Test one small area first and keep the project reversible where possible.
Chrome Delete Decision Checklist
Should I wrap or paint Civic chrome?
Vinyl is usually the more reversible choice and makes sense if you may return the car to stock. Paint can give a permanent, integrated finish but requires more preparation and makes future changes more involved. For a daily driver, choose based on the condition of the trim, how long you plan to keep the finish and whether reversibility matters.
Which Civic trim should I delete first?
Window trim is often the highest-impact starting point because it creates a continuous visual line along the side of the car. Badges are an easy secondary change. Grille trim deserves more care because edges and corners are more visible. Avoid deleting every bright surface simply because it can be covered; the goal is a coherent exterior, not the absence of every contrasting detail.
How do I make a chrome delete look OEM?
Match the finish to the existing black exterior trim, keep edges clean and avoid mixing several shades of black. Gloss black generally integrates well with factory-style trim, while satin creates a quieter appearance. Inspect the car from several angles after installation and make sure neighboring pieces have a consistent level of gloss and color.
Chrome Delete Maintenance and Long-Term Durability
The finished result depends on how the Civic is washed and where it is parked. Vinyl edges can be affected by aggressive pressure-washing, harsh chemicals and repeated contact with brushes. If the trim is wrapped, wash it with a mild automotive shampoo and avoid directing a pressure washer directly at exposed edges. A paint-protection product that is explicitly compatible with the chosen vinyl can also help, but follow the material manufacturer's instructions.
Inspect the Edges Before They Become a Problem
Check the front edges of window trim, corners around badges and the transitions around grille pieces periodically. Small lifting at an edge is easier to correct early than after dirt and moisture have worked underneath the material. If a section has stretched, shrunk or lost adhesion, replacing that section is normally cleaner than repeatedly pressing the same edge back down.
When a Chrome Delete Is Not Worth Doing
Some factory brightwork can provide useful contrast, especially on darker or highly customized Civics. If removing a particular piece requires dismantling a complicated assembly, permanently refinishing an expensive part or creating a difficult-to-match finish, consider leaving it alone. A good OEM+ build uses contrast deliberately. The goal is a cohesive appearance, not a rule that every bright surface must disappear.
Final Inspection Checklist
Before calling the project finished, inspect the car in direct daylight and under artificial light. Look for trapped dust, wrinkles, visible seams, inconsistent gloss, lifted corners and exposed original trim. Check both sides of the vehicle from the same viewing distance. If one side looks different from the other, correct that before moving on to another exterior modification.
Frequently asked questions
Does chrome delete affect resale value? Vinyl chrome delete is fully reversible, so resale impact is minimal. Painted trim delete is permanent and can reduce appeal to buyers who prefer the stock look.
How long does vinyl chrome delete last? Quality cast vinyl on exterior trim typically lasts 4–6 years with normal care. Direct sun and harsh climate conditions reduce that lifespan.
Can I chrome delete door handles without removing them? Yes — wrap in place using a pre-cut piece sized slightly larger, then tuck edges carefully. Removing handles gives a cleaner result but is not essential for a DIY install.
What about the Civic's window trim? The Civic window surrounds are one of the most popular chrome delete targets. The long straight runs are beginner-friendly. Use a single strip per run to avoid seams.