Best Coilovers for Honda Civic Type R
How to choose Civic Type R coilovers that preserve usable travel, verified fitment and real-world control.

Coilovers Change More Than Ride Height
A Civic Type R coilover decision is a suspension decision, not just a stance decision. Ride height, spring rate, damper control, bump travel, alignment range and tire clearance all move together. The FK8 and FL5 already use adaptive damping from the factory, so replacing the original dampers can mean giving up or electronically managing a factory feature. Start by deciding whether the car is a daily driver, a street car that sees occasional events, or a dedicated track project.
Quality coilovers can make setup changes repeatable. Poorly matched coilovers can reduce bump travel, introduce noise and make a car less composed on broken pavement. The most useful purchase is therefore the kit with clear Type R fitment, sensible adjustment range, support and installation documentation—not simply the one with the largest advertised drop.
| Priority | Look for | Watch for |
|---|---|---|
| Daily use | Corrosion protection, usable travel, conservative rates | Excessive lowering and harsh rebound |
| Street / autocross | Predictable damping and alignment support | Copying a track setup without testing |
| Track use | Spring-rate options and serviceability | Ignoring cooling, tires and driver development |
| Show stance | Clearance and reliable hardware | Bottoming, axle angle and tire rub |
FK8 Versus FL5 Fitment Is Not a Detail
Always buy a kit listed for the exact chassis. An FK8 product is not automatically an FL5 product, even when the mounting concept looks similar. The FL5 has different packaging, factory wheel/tire sizing and electronic systems. The listing supplied for the ST XTA kit identifies 2017–2024 Civic and 2024 Integra applications; it does not by itself establish Type R fitment. Treat that as a verification point, not a recommendation. The Godspeed listings supplied identify separate FK8 and FL5 products, which is the right way to approach generation-specific parts.
Understanding Height, Spring Rate and Damping
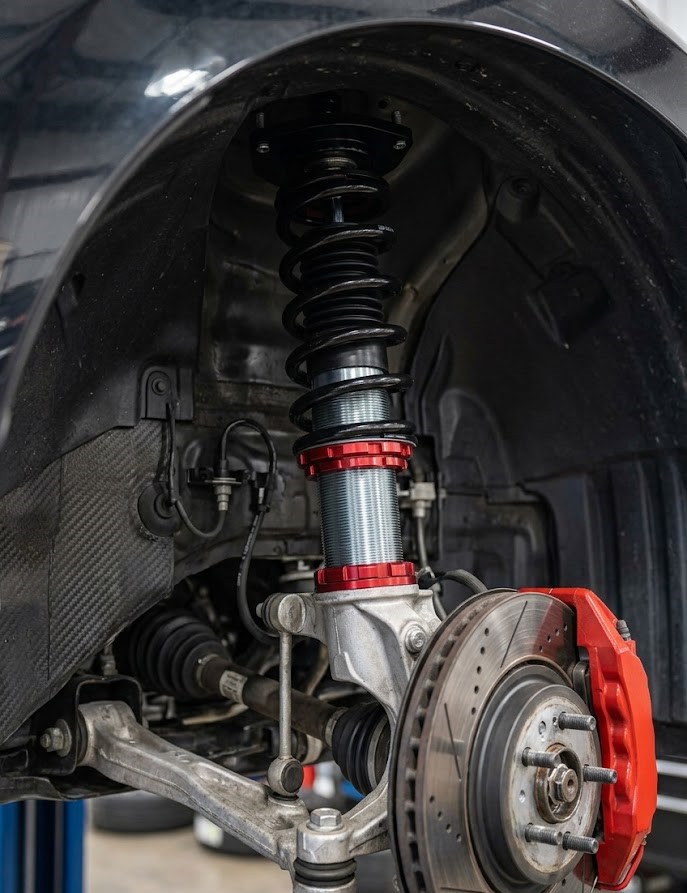
Spring rate resists compression; damping controls the spring’s motion. They are related but they are not interchangeable. If a car bounces after a dip, the damper may lack control. If it crashes into the bump stops, the issue can be travel, ride height, spring selection or damper calibration. Lowering a Type R until the wheel gap disappears may take away the travel the suspension needs on real roads.
Make changes one at a time. Set a practical baseline ride height, corner balance if the build warrants it, align the car, then tune damping in small documented steps. More damping is not automatically better. Too much rebound can stop the wheel from returning quickly over repeated bumps; too much compression can make the chassis skittish. Start from the manufacturer’s baseline and test on the roads or events you actually use.
Recommended Product Paths
What About Adaptive Damping?
Factory adaptive damping is part of the Type R’s character. A conventional coilover can remove factory damper adjustment, and an electronic cancellation solution may be necessary to avoid warning lights depending on the kit and chassis. Do not assume a resistor, delete module or plug is included. Confirm what happens to Comfort, Sport and +R damper behavior before purchase. For a daily-driven FL5 in particular, retaining the factory system may be the better choice if ride quality is a priority.
Installation, Alignment and Clearance
Budget for more than the kit. Installation should include an alignment after the ride height settles, and any altered geometry may require hardware or settings that a generic alignment cannot provide. Check front and rear tire clearance at full compression and steering lock. Wheel width, tire sidewall, offset and ride height all affect this. Our wheel offset guide explains why a change in wheel offset can create clearance issues even with the same tire size.
Use quality tools and torque fasteners at the specified ride height where the service procedure requires it. Recheck hardware after the initial break-in period. Suspension noises are commonly caused by loose top mounts, improperly seated springs, end-link preload or contact between an overly low tire/wheel setup and the body—not by an inherent “coilover sound.”
Buying Guide
- Confirm FK8 or FL5 fitment in the manufacturer catalog.
- Decide whether preserving adaptive damping matters.
- Choose usable travel before choosing the lowest advertised ride height.
- Plan for alignment, potential camber correction and tire clearance checks.
- Buy from a maker that publishes instructions and supports service parts.
Frequently Asked Questions
Do coilovers improve handling? They can, when the spring/damper package, alignment and ride height suit the use case. Lowering alone does not guarantee more grip.
How low should a Civic Type R be? Low enough to meet your goal while preserving travel and clearance. The correct number depends on wheels, tires, roads and alignment.
Do I need an alignment after coilovers? Yes. Ride-height changes affect alignment, tire wear and handling.
Can I use a non-Type-R Civic coilover kit? Only if the manufacturer specifically confirms it for your exact Type R chassis. Do not infer fitment from a broad “Civic” label.
Conclusion
The best Civic Type R coilovers are the set you can install, align and use without sacrificing the traits you enjoy about the car. Confirm generation fitment, protect bump travel and treat damping adjustment as a tuning tool rather than a volume knob.
Deeper Planning Notes
Coilover selection works best when the decision is documented before money changes hands. Write down the exact vehicle year, current parts, intended use, road conditions and the result you are trying to improve. That sounds basic, but it prevents the common situation where one change fixes a perceived problem while creating an unrelated clearance, comfort or maintenance issue. A suspension change should be evaluated in the context of the whole vehicle, because a Type R is a tightly integrated package rather than a collection of isolated catalog parts.
Use manufacturer instructions and the vehicle service information as the controlling documents for fitment, fastener procedures and maintenance. Product listings and owner discussions are useful leads, but listings can combine generations, show universal photographs or change over time. Before ordering, compare part numbers, application notes and exclusions. If a seller cannot establish the application clearly, pause rather than treating a similar-looking component as proof.
Budget for the supporting work. The best result often requires inspection, consumables, alignment or professional installation in addition to the visible part. A purchase that uses the whole budget can leave no room for fresh fluid, correct hardware, a post-install check or a tire replacement. In performance-car ownership, the unglamorous support work is usually what makes the modification dependable on a normal Tuesday as well as on an event day.
Make one meaningful change at a time when possible. It is far easier to evaluate a new component when wheel fitment, tire pressure, alignment, brake condition and engine calibration have not all changed in the same week. Keep notes on setup values, mileage, weather and impressions. That record helps you correct a problem and is valuable to the next owner if you eventually sell the car.
After installation, perform a controlled verification. Look for interference, leaks, warning lights, unusual noise and loose hardware. Test the car gently before escalating load. Reinspect after the first heat cycles or a short break-in period, then include the part in your normal maintenance routine. This is especially important on a vehicle that sees spirited driving, where heat and suspension movement reveal issues a driveway inspection cannot.
Be skeptical of universal claims. A part can be excellent for one climate, road surface, tire, driver and use case while being the wrong answer for another. Good buying advice names tradeoffs: comfort versus response, noise versus engagement, maximum grip versus longevity, and cost versus serviceability. Decide which compromise you can happily live with, then buy toward that outcome.
Finally, keep legal and safety requirements in view. Local inspections, noise rules, emissions rules and insurance requirements may apply to modified vehicles. Keep receipts and original components where practical. If you are unsure whether a change is safe or lawful for your use, ask a qualified installer or the part manufacturer before proceeding. A careful plan protects both the vehicle and the enjoyment that made you modify it in the first place.
Ownership and Follow-Up Checks
Once a coilover setup is in service, use the car normally before deciding whether another change is necessary. Early impressions are useful, but they can be distorted by unfamiliar feel, a new sound or the expectation of a dramatic difference. Check the basics first: tire pressures, fluid condition, fasteners, warning lights and any contact marks. These checks turn a modification from a one-time purchase into a maintainable part of the vehicle.
Seasonal conditions matter. The setup that feels excellent on warm, smooth pavement may behave differently in cold rain, on rough roads or when the vehicle is fully loaded. Revisit the decision with those conditions in mind. If the Type R is a daily driver, its real value is how consistently it works across the trips you actually make—not only how it performs in a short, ideal test.
Keep an eye on wear patterns. Uneven tire wear, unusual brake dust, new vibration, loose exhaust hardware or suspension noise should be investigated promptly. Do not treat a new symptom as normal merely because the car is modified. A quick inspection often identifies a simple correction before it damages a more expensive component.
Good documentation also makes future maintenance easier. Keep the product manual, installation invoice, alignment sheet, part numbers and a note of any settings. If you later change wheels, tires, pads or suspension, that baseline will help you understand what has changed and avoid starting fitment research from zero.
Finally, leave room for your priorities to change. A dedicated track build can justify compromises that become tiring when the car starts doing commuting duty. Conversely, a street-focused setup can be the correct long-term answer even if it is less dramatic in a parking-lot conversation. The most successful Type R builds are coherent, safe and enjoyable for their owner.
Make the Decision With Confidence
Verify the details twice: once before ordering and again during installation. Compare the part number, vehicle application, instructions and condition of the surrounding components. If a seller listing conflicts with manufacturer documentation, use the current manufacturer information as the deciding source. A specialist shop can often identify a clearance, electronic-control or labor requirement before the vehicle is apart.
Enthusiast upgrades reward patience. The finished setup should operate safely, feel intentional and make clear why that specific part was selected. Keeping receipts, fitment notes and original components where practical makes future maintenance and ownership easier.